


Flight deck - nice fit..

Staring to paint the deck..

The underside

The inside - Photo Etch being a pain!

As good as I can get the Quarterdeck rail

Starting to fit some of the compartments

More Photo Etch rail..

And more...

Lid still fits on OK!

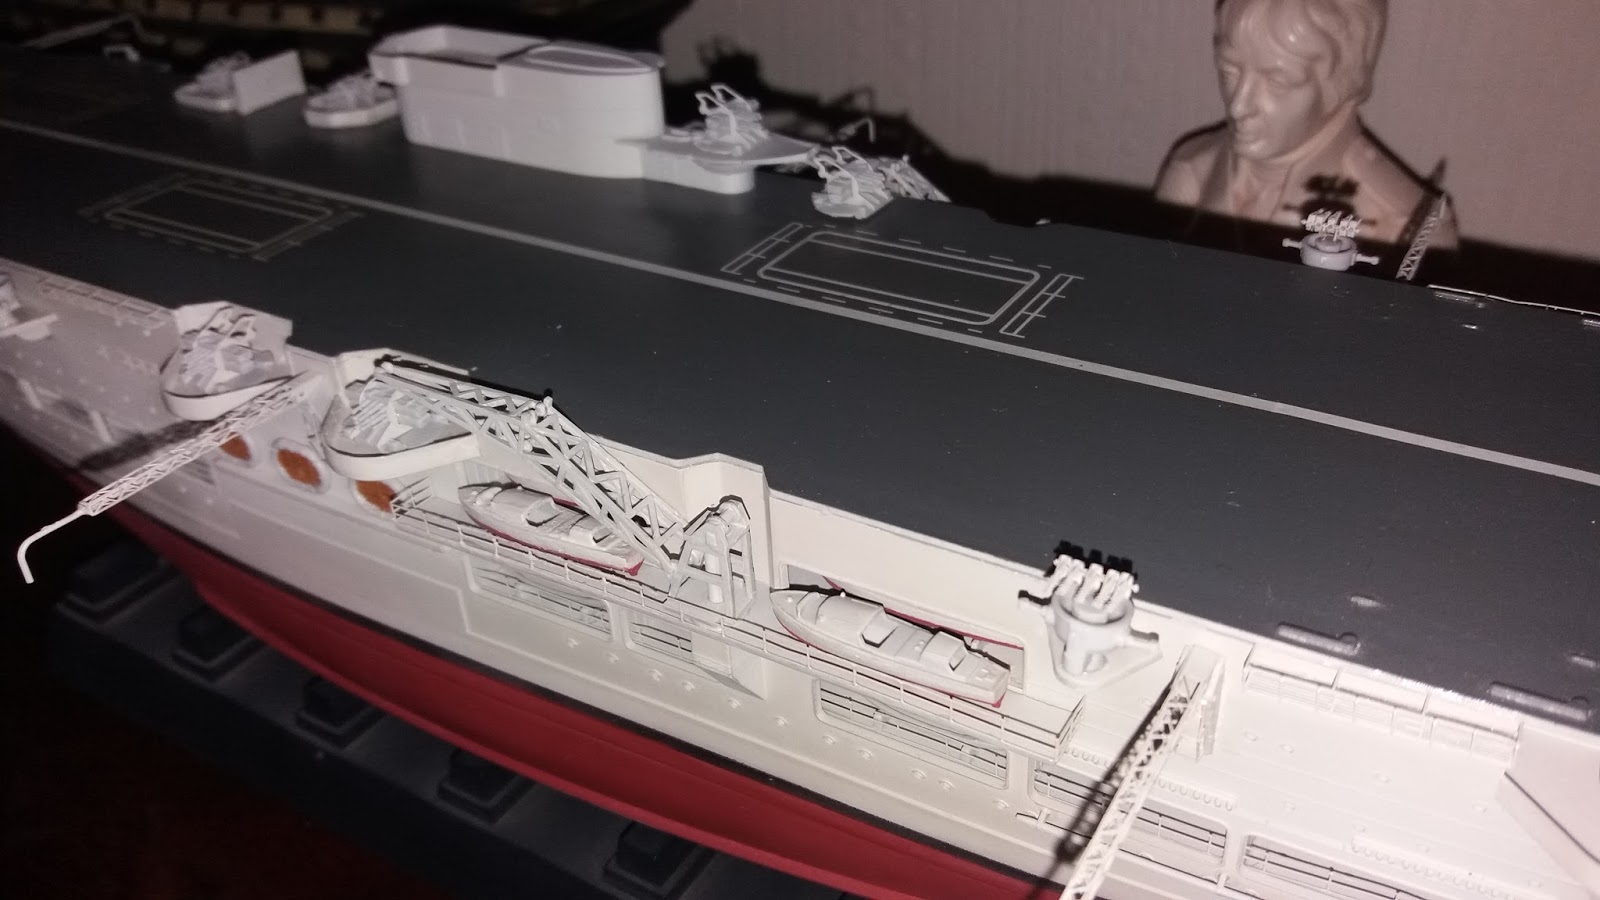
Ships boats

Starboard side

Starboard boats and more photo etch railings

And more...

Gun turrets fitted..

Aft..

Lovely bottom!


Matting the deck down after decal application


Tidying up some of the paintwork

Spot the un-deliberate mistake..

Can anyone tell?

Clue:- front end...


Reassembled after decal debacle


More deck edge P.E.

The P.E round the rear end was tricky..


More ships boats and cranes
Now to start on the island. Again, a good fit.

Staring to go together

Looking good

Funnel top P.E. another nightmare..

Island fitted.

Flight deck barriers fitted

Doesn't quite look right at the funnel top...

Apart from that, I'm happy so far

That looks better. Funnel top painted black (contrary to instructions...) Name plate finished, air group started..

Air group built, painted and decaled up!

Ready to land on!!!!


No comments:
Post a Comment